Classifier for skin lesion
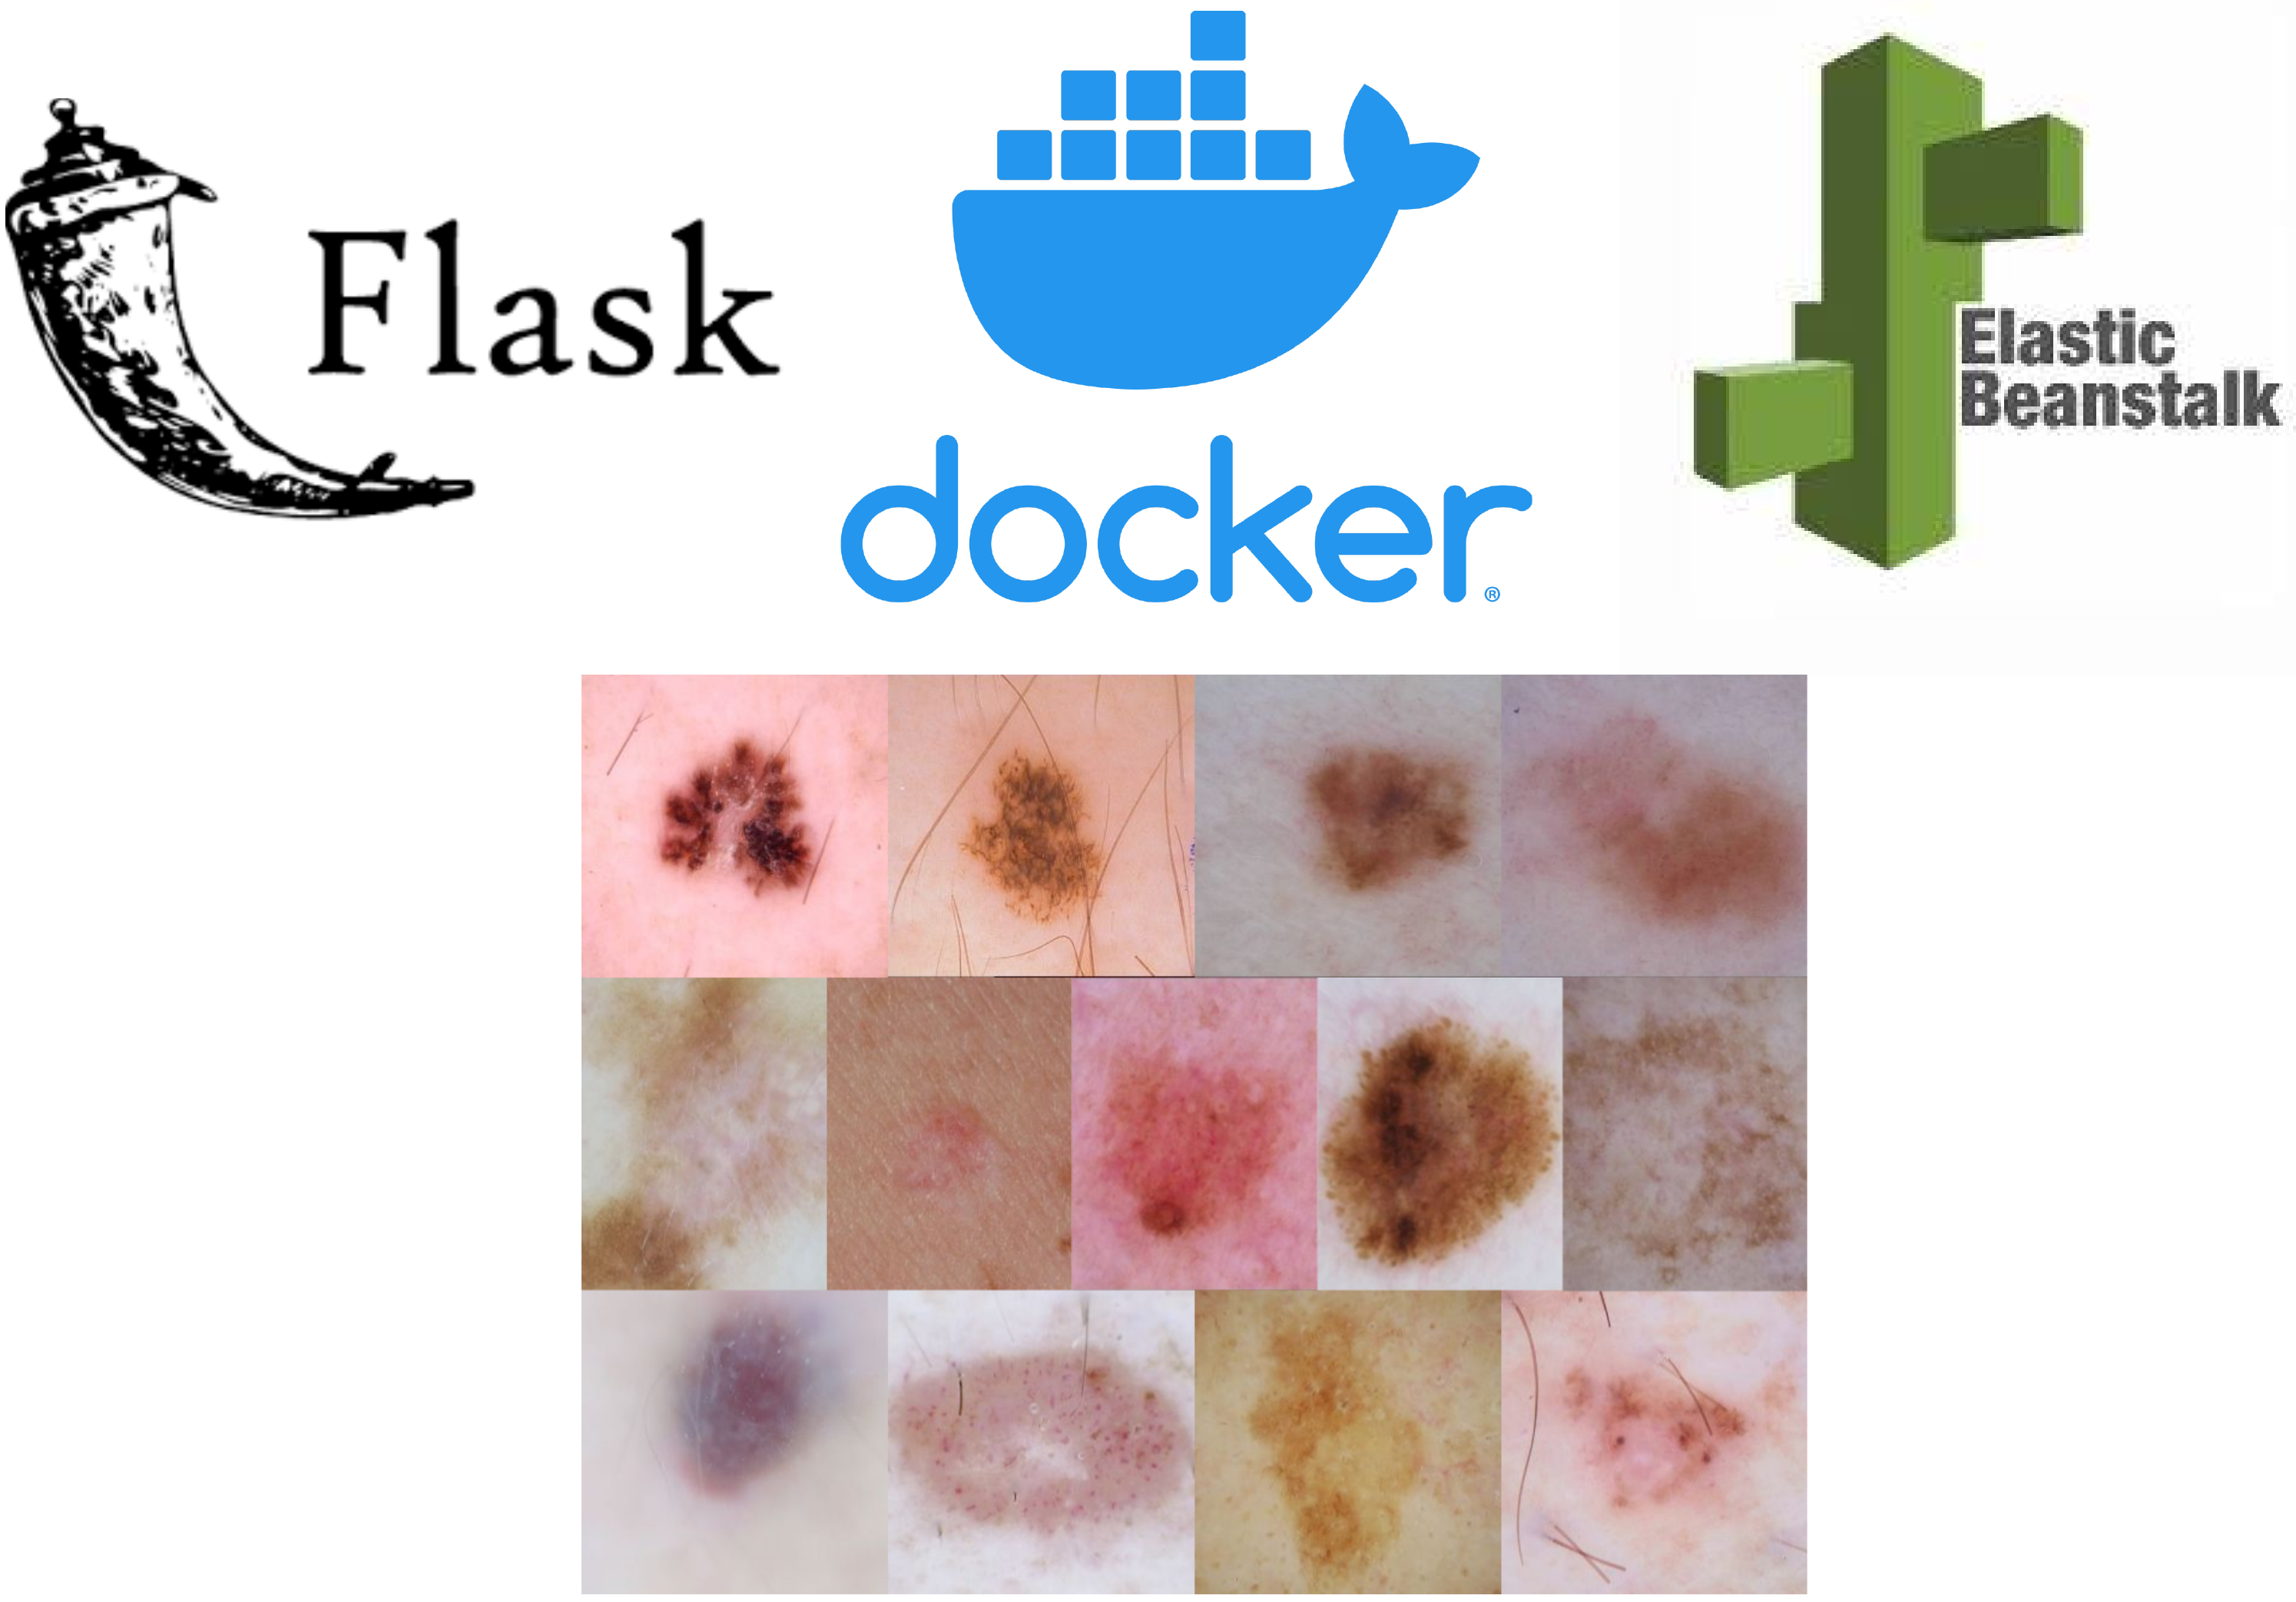
Using public data set provided by the International Skin Imaging Collaboration (ISIC), a DenseNet model was trained to classify dermoscopic images for 8 categories with the inclusion of meta data (e.g., age, gender). This work is an extension of a project I've done previously developing a melanoma classifier (see blog post). Please note this is NOT a diagnostic tool, therefore the output of the model is not to be interpreted as an actual diagnosis. The potential of this model lies in the monitoring of skin lesions (especially for patients with family history), and encouraging the user to seek medical attention more efficiently. The web app is hosted at this link (it is scheduled to run from 8am-6pm MST).
Tables 1 and 2 below are the performance metrics of the baseline model (no meta data) and the final model (with meta data), respectively.| Category | Precision | Recall | F1 | AUC |
|---|---|---|---|---|
| Actinic keratosis | 0.56 | 0.51 | 0.53 | 0.96 |
| Basal cell carcinoma | 0.81 | 0.82 | 0.81 | 0.98 |
| Benign keratosis | 0.67 | 0.75 | 0.71 | 0.94 |
| Dermatofibroma | 0.65 | 0.65 | 0.65 | 0.99 |
| Melanoma | 0.69 | 0.75 | 0.72 | 0.94 |
| Nevus | 0.91 | 0.87 | 0.89 | 0.96 |
| Squamous cell carcinoma | 0.57 | 0.67 | 0.62 | 0.97 |
| Vascular lesion | 0.77 | 0.81 | 0.79 | 0.99 |
| Category | Precision | Recall | F1 | AUC |
|---|---|---|---|---|
| Actinic keratosis | 0.57 | 0.67 | 0.62 | 0.97 |
| Basal cell carcinoma | 0.84 | 0.84 | 0.84 | 0.98 |
| Benign keratosis | 0.67 | 0.76 | 0.71 | 0.96 |
| Dermatofibroma | 0.55 | 0.92 | 0.69 | 0.99 |
| Melanoma | 0.76 | 0.75 | 0.76 | 0.95 |
| Nevus | 0.92 | 0.88 | 0.90 | 0.96 |
| Squamous cell carcinoma | 0.57 | 0.74 | 0.65 | 0.98 |
| Vascular lesion | 0.86 | 0.90 | 0.88 | 0.72 |
Flask app
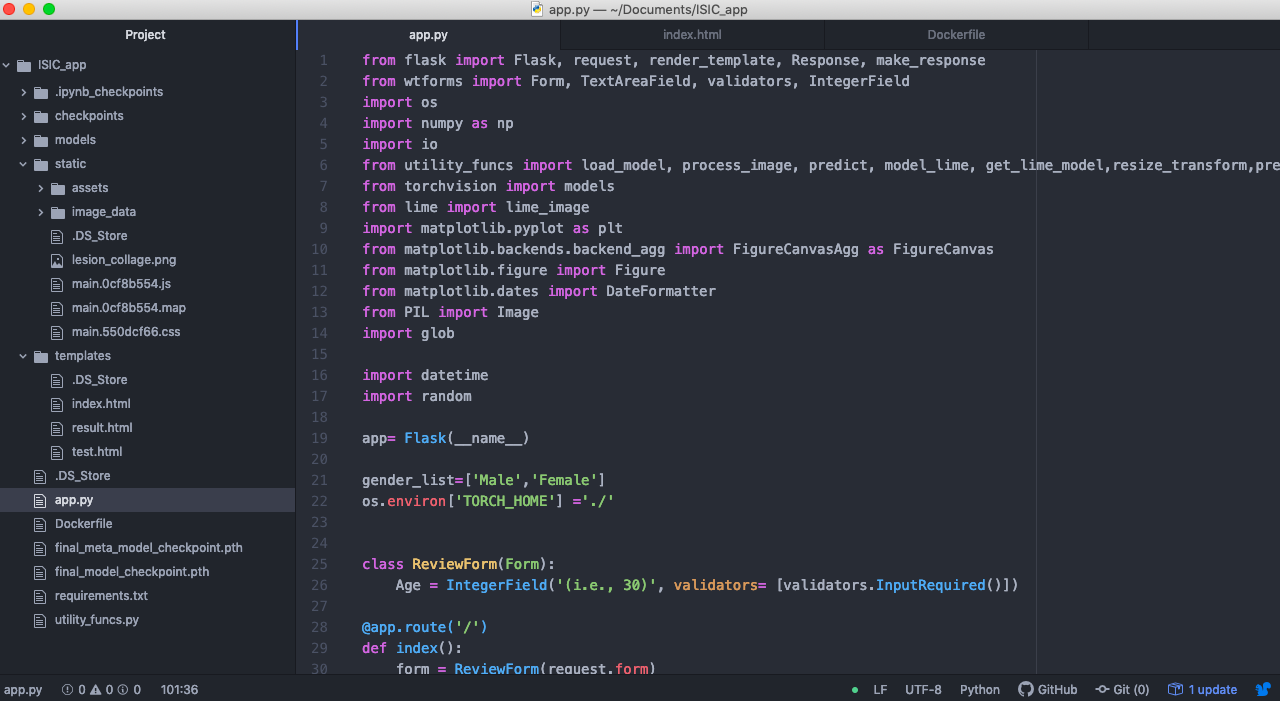
Flask requires a general directory structure such that html, css, and executable files are kept in separate folders as shown in Fig.1. It works with WTForms to pass user defined values/parameters[1].
To save the model weights downloaded from Pytorch, I overrode the default $TORCH_HOME environment
variable to store the file in the same root directory as the app.py. This way it doesn't need to spend the extra time
downloading the pretrained weights when it runs for the first time.
Docker container
A Dockerfile is the bare minimum for building a docker image. In addition,
the file requirements.txt lists all of the packages needed.
I've learned a few things about building images from the Dockerfile. 1)Don't try to run a Linux-based
Docker image on a MacOS host machine (unless you want to lose your sanity)! When I ran the Ubuntu-based container on my
Mac the png image failed to display on the html file and the container crashed. 2)Keep it simple - go
through the code base to figure out the packages needed to include in
requirements.txt. Docker will automatically download the dependencies.
3)Be mindful of the default Python in a given operating system. For example, Ubuntu 16.04 comes with Python 2.7 and
Python 3.5, so the python command runs version 2.7, and python3
runs 3.5. To install packages in Python 3.5 environment, the user needs to use pip3. To get a higher version
of Python than the sytem default, you can install it through a third-party PPA. But I have found that it's more trouble than it's worth, so I upgraded to a newer Ubuntu OS.
  FROM ubuntu:18.04

  MAINTAINER Jenny Yu

  RUN apt-get update -y && \
      apt-get install -y python3 python3-dev python3-pip

  COPY . /app

  WORKDIR /app

  RUN mkdir img_storage

  RUN pip3 install -r requirements.txt
  RUN pip3 install torch==1.3.1+cpu torchvision==0.4.2+cpu -f https://download.pytorch.org/whl/torch_stable.html

  EXPOSE 5000

  ENTRYPOINT [ "python3" ]

  CMD [ "app.py" ]
The folder img_storage is created inside the directory /app after WORKDIR sets it as the default. To build an image from the Dockerfile,
enter the local projects directory
and execute docker build -t [image_name]:latest .. The flag -t is for tagging the image.
To run the image on your local computer, execute docker run -p 5000:5000 [image_name]:latest
and it will show the url that is running the container. The -p flag should match the EXPOSE parameter in the Dockerfile.
Elastic Beanstalk (EB)
After checking that the Docker container is working locally, it's easy to deploy it via AWS's EB platform.
First, enter the local project directory and select all files to compress to a .zip file (make sure Dockerfile is there). Don't zip from the parent directory (outside of the app folder) because EB won't be able to find the Dockerfile.
- Log into the console and find the EB page under the Services dropdown menu.
- In the upper right corner click Create New Application, complete the prompt for the App name.
- Next create a new environment by clicking Create one now --> Select Web server environment.
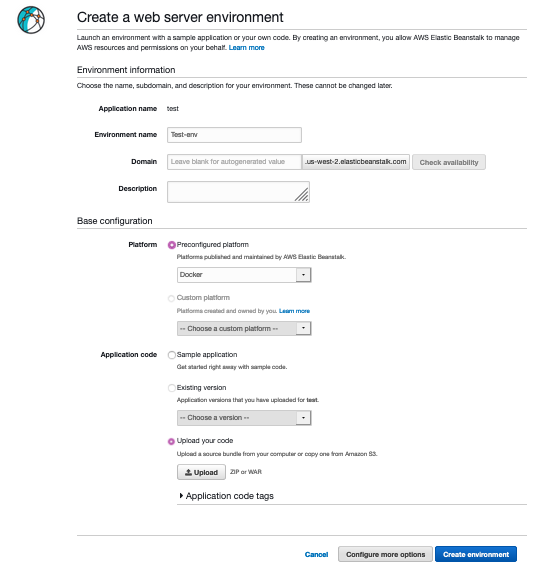
- Select Docker for Platform specification, and Upload your code under Application code (see Fig.2). Upload of the zip file will take some time.
- Before hitting the Create environment button, note that default Instance type(t2.micro) and other settings can be changed by clicking Configure more options to modify and apply the change.
- After clicking Create environment, be patient as it will take some time to deploy the app.
To change the instance after deployment, it can be done under the Configuration tab. If there's a health warning or issue, you may need to reboot the instance by going to Health -->Instance Actions.
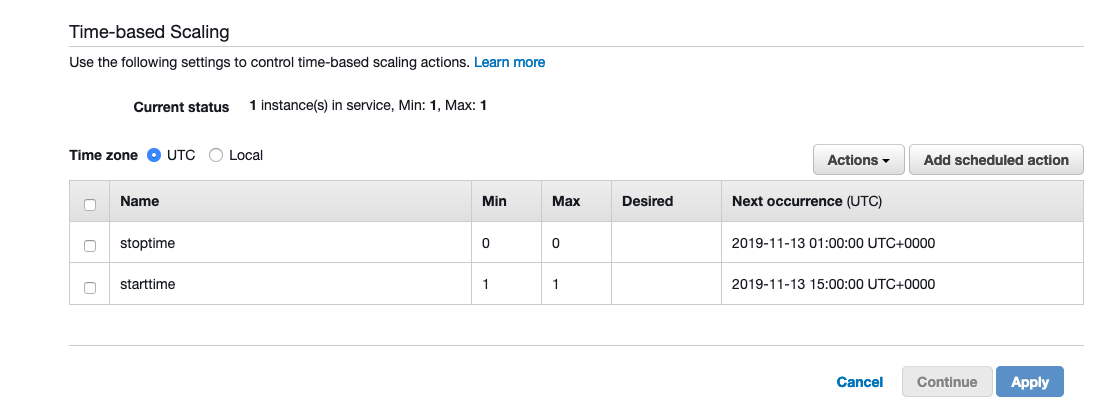
To reduce cost of running the EB app, there's a way to schedule the EC2 instance. Go to Configuration-->Scaling-->Time-based scaling, and specify each scheduled action (see Fig.3). For recurrent action, it is scheduled using cron expression. This set up won't terminate the environment, it is designed to stop and restart the EC2 instance(s).
Miscellaneous facts - After the app is deployed, if you stop or terminate the running ec2 instance(s) EB will automatically start a new instance of the same type. You can terminate the environment from the Environment console, and have the option of rebuilding terminated environment within 6 weeks of its termination. In the Environments page, go to Actions-->Restore terminated environment. This will create resources that have the same configuration as the old version but any data stored in the terminated environment will not be restored.
You can learn more about EB's available features (e.g. Load balancing, Auto Scaling) by visiting this page.
Despite the little hiccups I encountered in developing this app, I find that Flask provides a quick and straightforward way to build a web app. In comparison to Django, another open source framework for Python, Flask is lightweight and more suitable for simple websites. Whereas Django is a full-stack framework geared towards more complex development, and it provides more structures with built-in templates and tools[2].
REFERENCES
[1]Bonner, A. The brilliant beginner's guild to model deployment. https://heartbeat.fritz.ai/brilliant-beginners-guide-to-model-deployment-133e158f6717
[2]Mindfire Solutions, Flaks vs Django.http://www.mindfiresolutions.com/blog/2018/05/flask-vs-django/