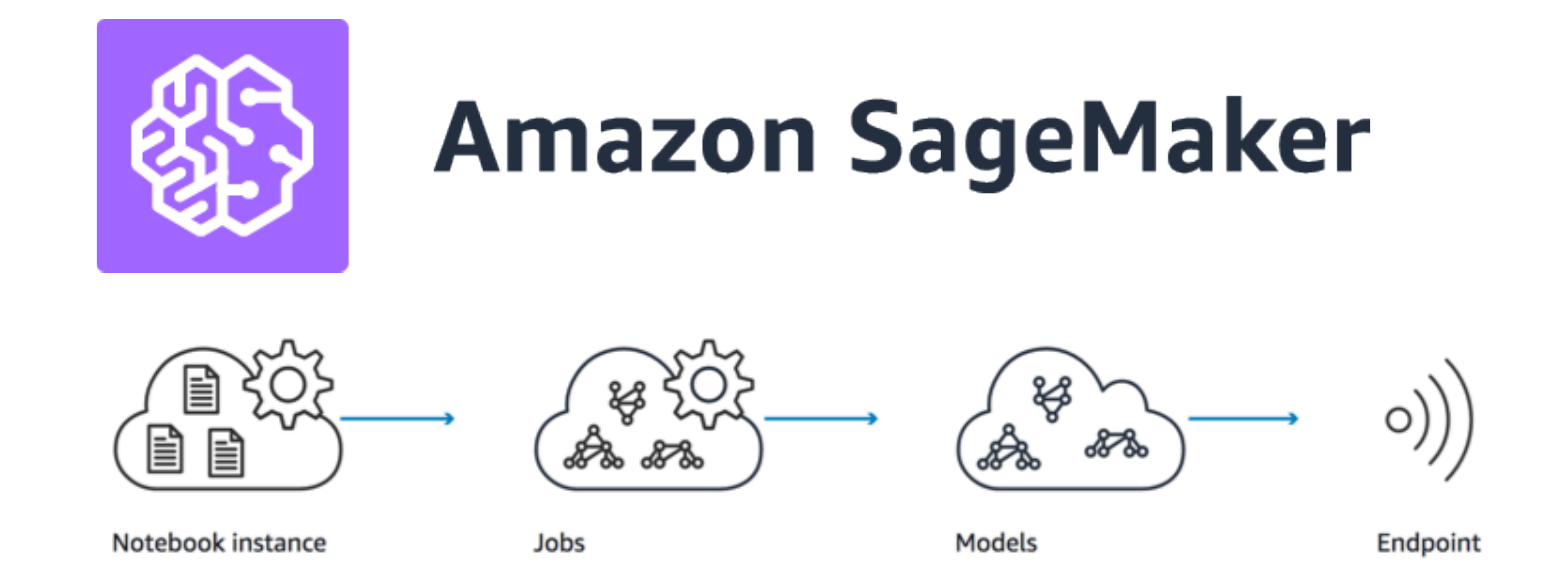
When to use SageMaker
In a nut shell, SageMaker(SM) is a cloud platform designed to quickly and seamlessly build, train and deploy ML models. The user can write and run ML/DL models, and SM will provision the necessary compute resources on the backend (e.g. EC2 instance, GPUs), and automatically spin up Docker containers. It's great for software developers and Data Scientists who don't want to be bogged down by system configurations and just want to focus on development of ML model[1]. Other reasons for using SM:
- Scikit-learn models are fully integrated into SageMaker in the form of
Scikit-learn Estimators, with support for scalable and elastic training jobs. - SageMaker Python SDK offers managed Jupyter notebook instance to support ML model training and execution. It also comes with APIs that support common Deep Learning (DL) backend such as Tensorflow, MXNet, and PyTorch.
- Deployment to endpoint faciliates frictionless integration into other application stacks.
- Endpoint object and model artifacts allow for efficient management and update of the model in a team environment.
The types of API
The AWS document labyrinth made it difficult to piece things together in a cohesive fashion. So I did some digging around and found some useful literature with clear description of the SM system. In essense, the API has three tiers: Amazon SageMaker SDK (high-level), AWS SDK for Python (Boto3), and awscli & Docker (low-level)[2].
The high-level Amazon SageMaker SDK is the most common, especially for beginners. It is hosted in a Jupyter Notebook IDE, and the user trains the model by specifying the instance types, and number of distributed workers. The SageMaker SDK will then automate the training jobs and the subsequent deployment to an endpoint. However, SageMaker SDK does not work with event-driven Lambda functions, and that's where Boto3 comes in [3]. The Boto3 API requires that the source code be uploaded to S3, and specifying the relevant configurations for SageMaker to run. It has more low-level features since Boto3 is the SDK for all of the AWS ecosystem. On the other hand, the awscli & docker API offers more ways to customize codes and system configuration. It's ideal for situations where the model or algorithm you want to use is not supported by SageMaker.
This blog post will focus only on the Amazon SageMaker SDK, because it's more user friendly and intuitive. By using the San Francisco crime dataset, I will walk through a straight forward tutorial on training a Xgboost classifier with hyperparameter search. I chose this after realizing that most SageMaker tutorials for xgboost are only for binary classifier and not multiclass, and doesn't offer more in depth details on the hyperparameter tuning API.
Training with SageMaker
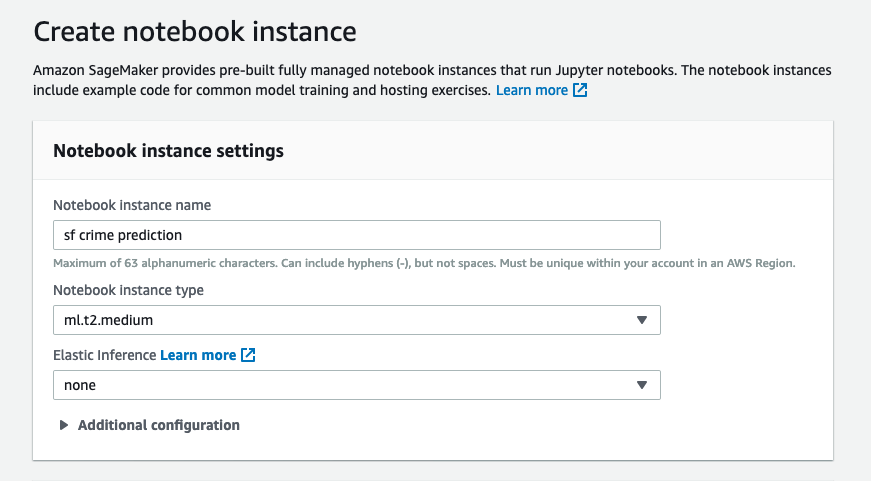
To get started, head to the Amazon SageMaker Dashboard. On the left menu, select Notebook instances. To create a new notebook, click on Create notebook instance (see Fig.2). At a minimum, it expects an instance type of ml.t2.medium.
To train models in SM notebook, the datasets need to be stored in S3, and its path need to be established using sagemaker.s3_input.
To instantiate the xgboost model, you need to call the docker image for SM xgboost as shown in the code below. The output_path is the S3 bucket that stores the trained model as .tar.gz file.
   sess = sagemaker.Session()
   container = get_image_uri(region, 'xgboost', '0.90-1')
   role = get_execution_role()
   bucket = 'kaggle.sf.crime'

   xgb = sagemaker.estimator.Estimator(container,
                                       role,
                                       train_instance_count=1,
                                       train_instance_type='ml.m4.xlarge',
                                       output_path='s3://{}/output/'.format(bucket),
                                       sagemaker_session=sess)

  # for multiclass target the user needs to specify num_class, otherwise it won't work, for some reason, can't change learning rate

  xgb.set_hyperparameters(
  objective='multi:softmax',
  eval_metric='merror',
  num_round=100,
  colsample_bytree=1,
  gamma=1.2,
  seed=2,
  num_class=len(concat_df['crime'].unique().tolist())
  )
  objective_metric_name = 'validation:merror'
At this point, the model object is ready for training by calling xgb.fit({'train':'s3://my-bucket/training', 'validation':'s3://my-bucket/validation}).
An alternative is to perform hyperparameter tuning by setting up the parameter ranges as show below. Here, max_jobs refers to the number of sampling points from the grid range, and HyperparameterTuningJobAnalytics returns
a table showing the status of the training jobs and the objective metric used to evaluated the model on
the validation set (under FinalObjectiveValue).
  hyperparameter_ranges = {
       'subsample': ContinuousParameter(0.5, 1),
       'max_depth': IntegerParameter(3, 10)
   }

   gridsearch= HyperparameterTuner(
       xgb,
       objective_metric_name,
       hyperparameter_ranges,
       objective_type='Minimize',
       max_jobs=5,
       max_parallel_jobs=10,
       early_stopping_type='Auto',
       strategy='Random')

   gridsearch.fit({'train': s3_input_train, 'validation': s3_input_validation}, include_cls_metadata=False)

   sagemaker.HyperparameterTuningJobAnalytics(gridsearch.latest_tuning_job.job_name).dataframe()
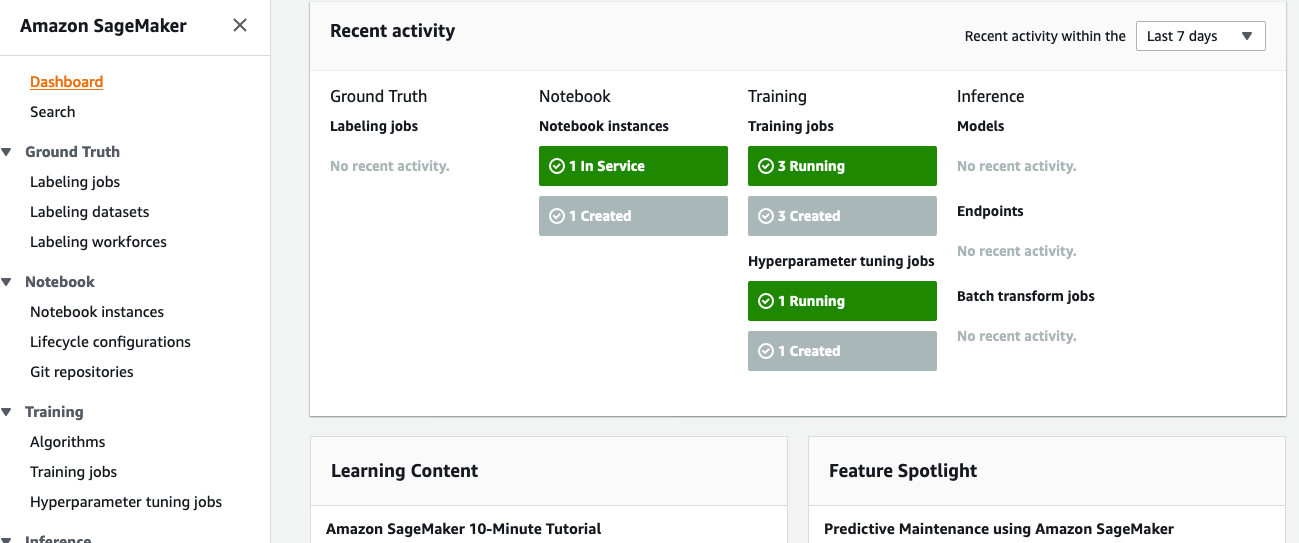
As show in Fig.3., the SM console shows the comprehensive activity status while the notebook is running. On the left panel, you can go to Hyperparameter tuning jobs under Training to view the progress of the training. Not only can you see the training and validation errors, but it also shows the CPU and memory utilization metrics.
Endpoint deployment
When the model is ready for deployment after parameter tuning, the best parameter can be automatically attached to the model Estimator. The user needs to specify the number of instance and type of instance for deploying the model. The endpoint is an object identifiable by an Amazon Resource Name(ARN) and defaults to private setting (keep reading to see how to share this resouce with IAM role permission).
  # Attach to an existing hyperparameter tuning job, which consists of multiple training job tasks
  xgb_tuning_job_name = gridsearch.latest_tuning_job.job_name
  xgb_tuner = HyperparameterTuner.attach(xgb_tuning_job_name)

  # Get the best XGBoost training job name from thejob
  xgb_best_job = xgb_tuner.best_training_job()
  xgb_tuned = sagemaker.estimator.Estimator.attach(xgb_best_job)

  # to deploy and then invoke the endpoint to make inference
  xgb_tuned.deploy(initial_instance_count=1, instance_type='ml.t2.medium')

  endpt_predictor=sagemaker.predictor.RealTimePredictor(endpoint=xgb_best_job)
  endpt_predictor.content_type='text/csv'
  endpt_predictor.serializer=csv_serializer
  endpt_predictor.deserializer= None

  select_cols=cols[1:]
  arr_val=validation[select_cols][-10:].values
  pred_result=endpt_predictor.predict(arr_val).decode("utf-8").split(',')
Keep in mind that charges will incur while the endpoint is being hosted and the notebook instance is running. You can delete the endpoint from the console by going to Endpoints under Inference, and you can stop or delete the notebook by going to the Notebook instances.
Invoking the endpoint
If you are working in a team and would like to share access to the model endpoint for future development and/or updating, it's best practice to assign permission based on a policy and IAM role. To invoke the endpoint, I followed a similar approach as this article by Zak Jost. I first had to set up a custom policy for a specific role ("Version" of policy should be "2012-10-17"). Then I created a third party account (child account) with a new user. The child account id is required in order for the parent account to grant the permission to the child. For this to work, the child account must have a user that will assume the role with its attached policy, for some reason using the root does *not* work.
# after calling the client with boto3, invoke endpoint.
endpoint_name='sagemaker-xgboost-200204-1841-002-fc901d44'

# payload_file is StringIO class that writes out strings
response = client.invoke_endpoint(
    EndpointName= endpoint_name,
    Body= payload_file.getvalue(),
    ContentType = 'text/csv')

str_result = response['Body'].read().decode()
For more details on compiling the codes, I've uploaded my notebooks at this link. The notebook "xgboost_sm_train" should be run as a SM notebook instance, and "xgboost_sm_inference" can be run on a local computer with the right awscli configuration. You will also need the parent account ID (the account that grants the policy) for assuming the role.
Beyond the basics
The material in this post covers the fundamentals to get started with AWS SageMaker, but there's more to it! If you want to retrain the model with new data on a schedule, and automatically push the updated model to the endpoint, then you need tools like Step Function or Lambda. Lambda function can be managed by AWS CloudWatch to set up resources and schedules. For future project, I'd like to turn the current endpoint I have into a public API using Lambda and API Gateway.
REFERENCES
[1]Amazon SageMaker – Accelerating Machine Learning, AWS News Blog, https://aws.amazon.com/blogs/aws/sagemaker/
[2]X, Guang. Start Your Machine Learning on AWS SageMaker, https://medium.com/weareservian/machine-learning-on-aws-sagemaker-53e1a5e218d9
[3] Dependencies are not completely specified #509 , https://github.com/aws/sagemaker-python-sdk/issues/509